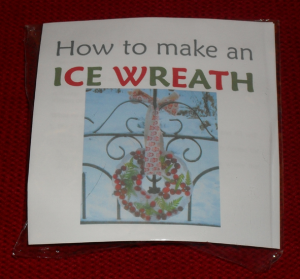
A sweet, last minute gift idea for any child you are seeing on Christmas Eve. This Magic Reindeer Food will guide Father Christmas to their house!
Salt Dough Decorations
Its a classic! Salt dough is so versatile, so cheap and you get so much out of one batch. This is a fun way to bulk out your collection of tree decorations if you don’t have enough. You will need:
- 1 cup of flour
- 1/2 cup of salt
- 2 tbsp of oil
- 1/2 cup of water
- Biscuit cutters
- Fine piping nozzle or a straw
- Acrylic paint
- Thread or ribbon
- Measure out flour and salt and place in a mixing bowl.
- Add the oil and water and stir until all the ingredients come together. If necessary add small amounts of water until the dough is soft and pliable.
- Roll out evenly and cut out shapes of your choice with the biscuit cutter (dip it in oil if the dough is sticking to much to the cutter).
- Use the piping nozzle or straw (or anything which will make a small hole) to create a hole to hang your decoration from. Its best to place this somewhere near the top but not too close as to make in vulnerable.
- Bake them in the oven at 100°C until they are completely dried out. I’ve found this takes at least three hours!
- Paint them as you please with acrylic paint (this will help prevent moisture get back into the salt dough).
- When the paint is dry add the thread/ribbon to hang them by.
Magnetic Paper Dolls
These magnetic paper dolls are just so adorable, I’m dying for a reason to make some. They would make a wonderful gift!
Crafty Kits
Packing a few craft materials in a nice bag or box along with some beautifully typed-out instructions can really add value to a few items which won’t break the bank. Search the internet for ideas, below are a few ideas which I’ve found to adapt to make a craft kit.
Favourite Quotations Bookmarks
Designing your own bookmarks makes a very lovely, but inexpensive gift.
You will need:
- A favourite quotation of the recipient (or quotation from their favourite book)
- Computer and printer
- Printer paper
- Laminating pouches
- Laminater
- Scissors or paper trimmer
What to do:
- Using an auto shape tool draw a rectangle a suitable size and shape for a bookmark (I made mine 21cm x 7.5cm) and make the border narrow and a pale grey.
- Type out your chosen quotation and add clip art or images of your choice. Print.
- Place the paper into the laminating pouch (if you want to ensure they are waterproof cut them out along the grey line first).
- Laminate.
- Cut out along the grey line (if you cut them out before laminating them leave a few millimetres of plastic around the edge to ensure they are sealed).
Woolly Gift Basket
This is an incredibly satisfying and fun way to use up scraps of wool and is perfect for making little gift baskets. These instructions use a flour and water paste but I used PVA glue mixed with water which seemed to work perfectly. I also happened to uses that fluffy wool (which isn’t to my tastes when its knitted) which looks wonderful used like this. I think it would look lovely filled with tissue paper and a few small gifts.
The Gift that keeps on Giving
This year why not put a craft kit on your Christmas list? This way next year you’ll have all the materials and equipment to make some lovely home-made gifts for your friends and family plus you’ll get to have lots of fun making them and maybe even keep one back for yourself!
Here are a few which I’ll be asking for:
Jewellery Making Kit
Block Printing Kit (To print your own Christmas cards)
Candle Making Kit
Container Candle Making Kit
Soap Making Kit
Bath Bomb Kit
Lip Balm Kit
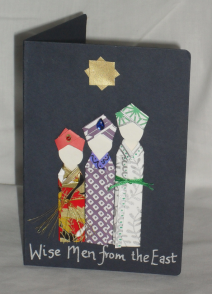
Washi Wise Men Card
Never throw away scrapes of patterned or colourful paper and you can make sweet little paper dolls. I have been really inspired recently by washi ningyo, these are little Japanese paper dolls (washi means Japanese paper and ningyo means doll). To me they seemed to lend themselves to making a nativity scene (coming soon) and I created this card using the wise men design. This does not need to be done with washi, any patterned or colourful paper will work.
You will need:
- White, light-weight card
- A selection of patterned/colourful paper (small scraps can be used)
- Any embellishments you choose (I used beads, gold and silver pen, felt-tip pen and embroidery thread)
- Glue stick or double sided tape
- Blank card
What to do:
- Print or trace the body template onto the white card. Cut out as many as desired.
- To make the robe:
- Cut paper 4cm x 8.5cm. Place so it is taller than it is wide.
- If desired, fold down the top of the paper a little to make a collar.
- Place the paper right side down and then place the body on the centre, so the head is above the top of the paper.
- Fold one side down over the shoulders and crease along the edge of the shoulders but no further.
- Fold the rest of this edge along the vertical side and ease the paper where the angle changes. So that the fold is almost horizontal. Carefully stick to the body.
- Repeat on the opposite side.
- Add any decorations you choose.
- To make the turban:
- Cut paper to 7cm x 2.5cm. Place so it is wider than it is tall.
- Fold the long sides in so that they almost meet in the middle.
- Fold in half length ways so you have a long thin strip.
- Place it behind the head.
- Fold one side up over the face at an angle about 45° and repeat with the other side.
- Fold the uppermost strip down behind the turban and tuck into the strip at the back of the head and repeat.
- Carefully stick to the head and decorate as you please.
- To make the star:
- Cut paper to 2cm x 2cm.
- Mark the central point and fold the corners in so they meet in the middle, creating a smaller square.
- Pull the corners out again and fold so that the points stick out.
- Turn over.
- Arrange on the blank card and carefully stick down.
- Add any other decorations you desire.
Template:
Body template
Felt Dahlia Brooch
I love this gorgeous design for a brooch made from felt. Its quite easy although does require a lot of patience while waiting for the glue to dry.
Brown Paper Wrapping
This year I’m designing my own wrapping paper using brown paper. This is not the very cheapest option (really cheap wrapping paper does cost less than brown paper) but if you need something more durable brown paper is much cheaper than the better quality wrapping papers. Then simply decorate as you please, try using things that need using up or resources you already have. I made some birthday paper the other day simply by rubber stamping on to brown paper which looks lovely.
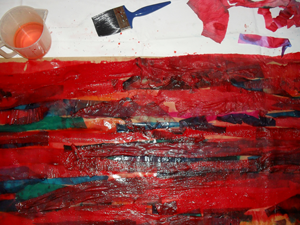
But I am creating my Christmas wrapping paper by staining the brown paper with tissue paper and crepe paper and then doodling on it with gold pen.
I happen to have loads of tissue paper which isn’t colour fast. If you place wet (not colour fast) tissue paper or crepe paper onto paper (or any surface) the dye with bleed onto and stain the paper. This could also be done by cutting shapes out of tissue paper and spacing them out.


